4×4 – CFAO Mobility Zambia

Observations

Escaping a vehicle after a rollover

    • The reasons why a vehicle rolls over on its side

A vehicle can roll over due to various factors. Among them are: a sudden, sharp turn when driving at high speeds; sudden braking; a side collision; inadequate or improper driving of a vehicle when driving up or down an incline or impacting a ditch or hole in the road while driving.

    • Maximum lateral incline angle

In addition to maintaining the proper speed and avoiding sudden changes in direction, steer clear of surfaces or terrain which may give out. Pay special attention when driving on steep hills. The average rollover angle for a vehicle when stopped is 30° on its side and 40° for the front and rear. When the vehicle is in motion, the condition of the terrain contributes to its instability. In terrains with large rocks with holes or ditches, even a 5 degree incline can cause a rollover. It is ideal to “feel” these angles in a controlled environment rst so the driver does not exceed the vehicle’s limits during real-world driving. Many o-road vehicles are modied by their owners, which usually result in increased weight and a shift in the vehicle’s center of gravity, which means the driver should exercise extra caution in these situations.

    • Escaping a vehicle after a rollover

If a vehicle rolls over, do not panic and proceed with caution.
1. Turn off the engine: Turning o the engine avoids engine oil or fuel from igniting, which may cause additional problems such as burning the engine. If the vehicle is equipped with a pre-heater (usually found on older diesel models) turn this o as well.

2. Prepare your departure: Prepare to exit the vehicle, and always use your seat belt while driving since it will protect you in the event of an unexpected rollover.

3. Release your seat belt: If you are unable to unlatch the belt, cut the strap with a seat belt cutter.

4. Open the door or a window: Open the appropriate window/door to begin your escape. If the door or window are stuck due to a deformation of the vehicle chassis or body, use a hammer to break the window.

5. Escape from the vehicle: Examine to determine if the escape route is secure and exit the vehicle. Avoid proximity to the tires, since the engine or transmission may be hot and the fuel tank may ignite. Evaluate the terrain condition and the vehicle’s stability before you decide which way you will exit.

6. Escape to a secure area: To avoid secondary lesions, step as far away from the vehicle as possible and get help.

    • Tools which save lives

If a seat belt cannot be removed or if a door or window cannot be quickly opened, the results may be fatal. To prepare for such an emergency, special tools exist. Some of them are a combination of a hammer to break open a window along with scissors/cutter to cut o a seat belt. These are useful to escape a vehicle for both a driver as well as a passenger. The proper tool selection must be done carefully, since there are different sizes. Tools should be placed somewhere easily accessible by the driver even when the vehicle is turned over.

Advanced Techniques

    • The winch – your easiest way out

Use a cable or a tie strap not only to get unstuck, but also to remove objects, as well as climbing or descending very extreme inclines. A cable or strap can be used to do most of the work in freeing a vehicle. However, straps or winches should never be used to lift up or move people, nor should they be used to lift any other type of object.

A cable or tie strap requires an anchor. Other vehicles may be used as anchors, but natural objects, such as trees, tree trunks or rocks serve best. Choose your appropriate anchor wisely and always make sure it is capable of holding the additional weight.

    • Operating the winch

1. Depending on the weight of the object you are trying to move, decide on the number of pulleys, the length of the cable, how to hook the cable (for example double/triple line) and the pulling direction.

2. When anchoring the vehicle with the winch, engage the parking brake and put stops on the wheels. You may note that pressing the brake pedals gives additional stability.

3. If required, use an additional anchor to increase stability or avoid the vehicle from shifting out of position.

4. Wrap the anchor with a leather cushion. Also place a blanket or tarp in the center of the winch strap.

5. If possible start the stuck vehicle’s engine and put it in neutral.

6. Point the steering wheels in the direction the vehicle is being pulled.

7. Start the pulling vehicle’s engine and begin to pull.

    • Retracting the winch cable

Always inspect and carefully retract the winch cable after using. When winding up the cable, make sure you distribute it in an even an uniform fashion in the spindle. Replace the cable if you nd it to be damaged. For more information regarding the winch and cable, refer to the unit’s instruction manual. Never follow a vehicle too closely, since it may suddenly stop when it becomes stuck, and rocks may fly out from under the wheels and may damage your vehicle. In dusty conditions, you should give considerable room between your vehicle and the one in front of you.

*Caravans: When travelling in a caravan, you are responsible for the vehicle behind you, Always keep it within your sight, making sure you are aware if any problems present themselves.

Inspecting before driving over dicult terrain

Before staring the engine

OUTSIDE OF THE VEHICLE

Tyres (including the spare): Check the pressure with a tire gauge and carefully inspect the tires for cuts, damage or excessive wear.

Lug nuts: Make sure there are no loose or missing lug nuts.

Fluid spills: After the vehicle has been parked for some time, verify below the underbody to see there are no oil, water or other spills. Ensure that the water which drips from the air conditioning unit after operation is completely normal.

Lights: Make sure the head lamps, brake lamps, stop lamps, turn signals and other lights are working correctly. Verify the light emitted from the main head lamps.

INSIDE THE VEHICLE

Hydraulic jack and lug nut wrench: Make sure you are travelling with a car jack and the appropriate lug nut wrench for your vehicle. Seat belts: Make sure the seat belts lock firmly.

Also check that the straps are not worn or frayed.
Instruments and controls: Take special care in assuring that the maintenance warning lamps (for example for temperature) are working properly.
Brakes: Make sure the pedal travels smoothly and there are no objects to block its path.

UNDER THE HOOD

Replacement fuses: Make sure you travel with replacement fuses. You should have fuses for the entire range of amps your vehicle has as specified on the fuse box lid.

Coolant level: Make sure your vehicle has the proper amount of coolant.

Battery and cables: All battery cells should be filled to appropriate levels with distilled water. Look for corroded or loose terminals or cracked cases. Make sure the cables and connections are secure.

Cables: Look for loose, damaged or disconnected cables.

Fuel lines: Check for spills or loose connections.

Entering the vehicle

1. Adjust the seat position, seat back, headrest and steering wheel position.
2. Adjust the inside and outside rear view mirrors.
3. Check the locks on all the doors.
4. Check the latch on every seat belt.

Inspecting after driving over difficult terrain

Vehicle condition

The engine and drivetrain components are subjected to intense heat and load when driving off road. Driving in water exposes these hot components even more, which causes even greater wear and degradation.

Mud and sand may stick to the vehicle and cause corrosion. Vehicle parts may also have been damage by rocks or other obstacles in the road.

Basic maintenance

1. Cleaning: Start by washing the vehicle. Focus more on the undercarriage with the following in mind:
Adhered mud can affect tire balance and result in vibrations when driving at high speeds. Check damages on the tires and wheels. Hub caps and tire sidewalls should be examined carefully, since they are subjected to the most damage when driving over rocky terrain. Mud trapped over skid plates and the transmission protector which may cause  oxidation. Sand can easily penetrate the arms which hold the axle and bushings which may cause premature wear in other areas of the vehicle. Dust which as adhered to the front of the radiator can reduce the vehicle’s cooling capacity and may even cause rusting.


Quick inspection: Check around the tyres and below the vehicle for any visible damage.

Damage to the vehicle’s chassis or body: Damage to the bumpers should be dealt with immediately, since it can interfere with the tyres’ rotation and/or parts of the drivetrain.

Damage to the drivetrain: Damage to the differential or the transmission axle could cause an oil spill or create unstable steering.

Damage to the brake lines or cables: small rocks could lodge into these components, causing a fluid spill or damaging the cables.

Inclination: Place the vehicle on level ground to determine if the vehicle is tipping to one side.

Quick inspection

After washing and inspecting, the following maintenance procedures may be applied.
1. Sand and dust in the air filter must be removed. This can be done by lightly shaking the air filter. If a large amount of dust remains, consider replacing the air filter entirely.
2. Check the engine lubricant levels. If water has entered the lubrication system, the oil will appear whitish. If carbon deposits are found in the oil system, then the lubricant will blacken more than usual. If you see the oil level below the manufacturer’s recommended level, add as needed. If you are loosing excessive amounts of oil, you must identify the cause and have this repaired at once.
3. The transmission fluid and brake fluid levels should be inspected and verfiied in the event they are below the manufacturer’s recommended levels.
4. Top off the battery cells with the appropriate amount of distilled water.
5. Make sure all the necessary joints on the vehicle are adequately greased.
6. Any damage to the vehicle’s transmission should be checked at an appropriate service center.
7. Damaged tires or wheels should be replaced at once.

Driving Techniques

Climbing a hill

  • Approach path

If you are facing a steep or slippery hill, having an approach path to gain speed can reduce the loss of traction when driving uphill. If there is no room for an adequate approach path an alternate route can be used. An approach path however should be limited to surfaces with no potholes or other large irregularities When there is room on the surface, it is better to climb at a slow constant pace to reduce damage on the vehicle’s underbody.

  • Driving recommendations

1. Speed, distance and direction: Make an approach at an appropriate speed and from sucient distance. Climb the slope directly towards the crest.

2. Long slops: When climbing a long slope, keep a constant speed.

3. Operating the Clutch: (when the vehicle is equipped with a manual transmission): It is better to not switch gears when driving a manual transmission. However, if a gear shift is required, do it quickly and with little clutch use in order to avoid loss of momentum and traction.

4. Acceleration: When climbing a hill, use constant acceleration and ease o the pedal when reaching the crest to avoid damaging the vehicle underbody. If the tires loose traction due to an excessively slippery surface, slowly reduce the amount of acceleration to return traction to the wheels.

  • Recovery

If you completely loose forward momentum and begin to slip before reaching the top, use the engine and transmission to brake (only for manual transmission vehicles) to recover. Keep the vehicle pointed towards the upper portion of the hill and use your rear view mirrors to guide you along your descent. It is best to avoid braking in order to avoid wheel lockup. However, brake softly to keep the vehicle under control* when your vehicle has an automatic transmission since the engine will not be able to assist in slowing you down.

Driving down a Hill

  • Driving Tips

1. Gear selection and braking: Choose a low gear (or reduction gear in an automatic transmission) to take advantage of the engine’s braking capacity, reducing the use of the conventional brakes. When driving down a steep slope, it’s advisable to choose “L4” or “LL” to obtain maximum engine braking capacity. Depending on the vehicle’s transmission (automatic or manual) and the driving conditions, you may have to use the brake pedal.

2. Maintaining course: Drive down a hill perpendicular to the base. If tires loose traction, accelerating softly may return traction and steering control.

3. Long slopes: Vehicles tend to increase speed when going downhill continuously.

4. Clutch operation: When driving downhill, do not apply the clutch since this will eliminate the engine brake, causing a loss of traction and acceleration. This is one of the most dangerous things to do when driving downhill.

Holes or wading areas

  • Driving Tips

1. Approach angle and path: Approach crevasses and holes (ditches) at an angle which allows for maximum control. Direct approaches may result in impacting the front bumper or the skid plate against the edge of the hole. By approaching at an angle, the space to maneuver is increased. Approaching at an angle also makes the tires overcome the obstacle one by one, reducing stress on the chassis. It is important at this time for at least three of the four wheels to maintain traction. Make sure to use the vehicle in 4WD mode at all times with the center differential lock applied (if applicable) to drive in these conditions.

Warning: If you are approaching at an incorrect angle, both wheels may enter the ditch at the same time, which can cause you to become stuck. Drive with caution.

Approach the ditch at an angle and allow for the tires to enter one by one:

2. Driving speed and acceleration: Slowly let the tires enter the gap one at a time. Then, accelerate gently until the tire begins to exit the ditch and decelerate immediately after the tires pass the obstacle. Repeat this process with each of the four tires. On slippery surfaces, increase or decrease speed as deemed necessary.

3. Reduce depth or inclination: When the depth or the angle of an obstacle is too great, adjustments can be made by placing a rock or another object where the tire makes impact.
Have the tire make contact with the “wall” of the gap/ditch and then accelerate softly to make the tire overcome the “wall”. Decelerate immediately after the tire overcomes the “wall”.

Inclines

  • Driving Tips

1. Approach angle: Dierent procedures must be made depending on the circumstances. Regardless of the procedure chosen, make sure the driver’s side is facing the ascending incline (looking up towards the summit). This gives the driver a greater sense of security.

2. Driving speed and acceleration: Constant acceleration and driving speed is always best.

Mud

  • Driving Tips

1. Path: Drive only on shallow mud (the depth of the mud should never be above the lower portion of the center differential). Keep the wheels on the most solid terrain possible.

2. Gear selection: Choose a lower gear which you are able to control on muddy surface. If the vehicle is equipped with locking differentials, make sure they are locked.

3. Clutch operation: Maintain speed in such a way that you do not loose traction and not required to shift gears. Shifting may result in sudden deceleration and make the vehicle become stuck.

4. Steering operation: Turning the steering wheel on muddy terrain may increase the surface resistance. Try to keep the steering as straight as possible.

5. Adjusting tire pressure: On muddy surfaces, the mud may become stuck on the gaps between the tire tread (contact patch), reducing traction which make the vehicle easily become stuck. To avoid this from happening, reduce tire pressure to 1.2 kg/cm to 1.5 kg/cm (17 to 21 psi). This results in an increase in traction. If the mud is too wet, increasing tire pressure may result in an increase in traction, which will result in less mud getting stuck on the tires.

On muddy terrain, consider the use of tire chains.

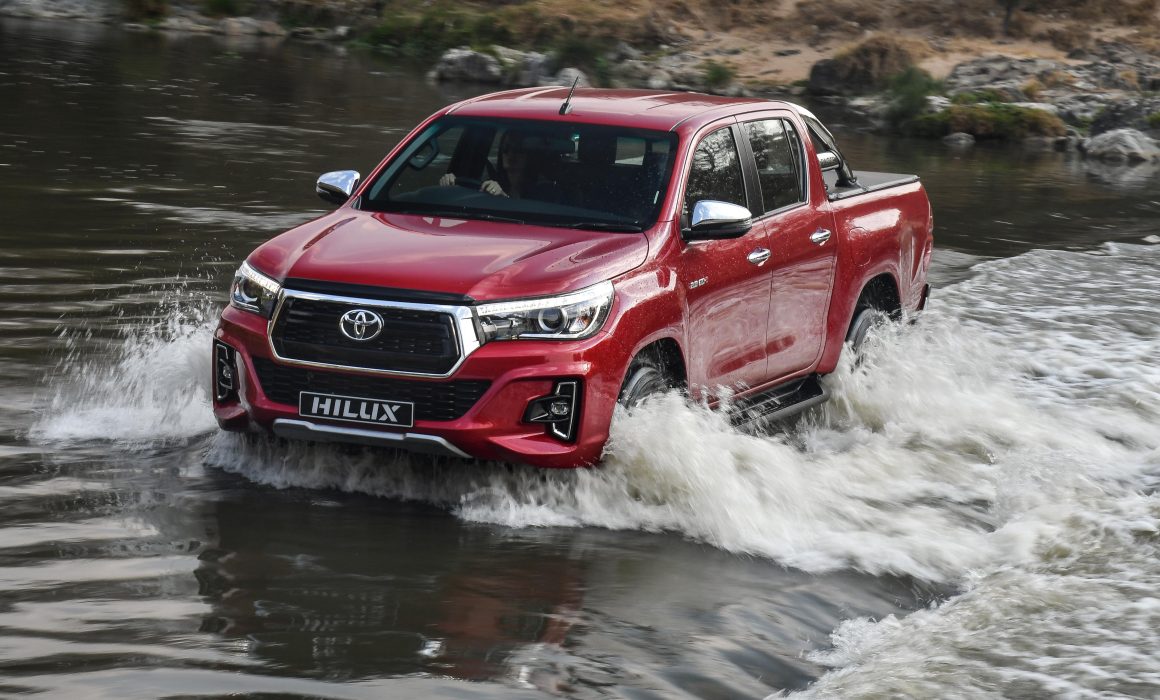
Rivers

  • Driving Tips

1. Approach angle and path: Choose a path going downstream. Driving against the ow of water may make the vehicle become stuck. Also avoid water depth greater than the center of the wheels. In places where a river is owing slowly, you should be especially careful of mud and sand accumulations on the river bed. Water is usually deeper than it looks, which is why you should add between 20 to 30 cms to the appeared depth from the surface.

2. Gear selection and speed: L4 (part time) or LL (full time) is a good gear selection and constant acceleration will avoid water from entering the engine and exhaust. If water enters the air intake or electrical system this will cause water hammering/broken connecting rods* or a short circuit.

3. Steering operation: The ground beneath the water may not be visible due to mud or reection on the surface. These situations may cause the vehicle to become stuck in a gap on the river oor. To avoid accidents in these situations, your thumbs should never be on the inside portion of the steering wheel.

4. Choose where you will exit: Where you exit the river should be a solid surface will a small incline. Many vehicles become stuck when exiting a river.

Water hammering / broken connecting rods: if the amount of water which enters an engine’s combustion chamber exceeds its capacity, the appropriate engine combustion stops. This may cause the connecting rod to bend or break, as well as possibly damaging the piston.

Sand

  • Driving Tips

1. Traction and tire pressure: On sandy terrain the surface is usually soft with a high degree of resistance, similar to muddy terrain. This is why gaining traction on sand is dicult. To avoid becoming stuck, reduce your tire pressure. However, reducing pressure excessively may cause the tires to separate from the wheels, which will bring a whole new series of problems.

2. Gear selection: Considering the lack of traction, “L4” (LL) is a good choice. If your vehicle come equipped with locking differentials, use them.

3. Steering and clutch operation: Do not turn suddenly. Operating the clutch may cause the vehicle to become stuck. Therefore, use a gear which can take you the entire way without having to change it. If you must switch gears, do so quickly so as to not lose wheel torque. Automatic transmissions are recommended over a manual, since they don’t require clutch operation.

4. Stopping the vehicle: Applying the brakes will sink the vehicle into the sand. Therefore, let the vehicle roll to a stop, or better yet, stop the vehicle on a solid surface which will make starting o on a hill possible.

Rocky Surfaces

  • Driving Tips

1. Gear selection and speed: L4 (LL) is the appropriate transfer lever position for driving over steep rocky terrain. Drive at a moderate speed, since driving at higher speeds may shoot rocks from the ground to the undercarriage of the vehicle, which may result in vehicle damage. Also, the impact of driving over a ditch or hole may damage the tires, wheels and/or suspension.

2. Trail: For your safety, it is recommended you have a passenger in the front seat assisting the driver. Observe sharp rocks which may damage the wheel or puncture a tire. When driving over rocks, make sure these will not move out of place. If a rock moves from the tire to below the vehicle when driven under, it may lodge under the chassis or may cause a rollover.

3. Tire pressure: Lowering tire pressure is an option when more traction is required. However, higher tire pressure will be needed more often to minimize damages from the rocks to the tires and wheels.

4. Steering operation: When preparing for the possible steering kickback caused by rocky terrain, place your thumbs over the steering wheel. You must keep a firm grip at all times to avoid moving o-course from the originally selected path.

Snow

  • Driving Tips

Inspecting the terrain

1. Since dangerous objects may be below the visible slow, walk over the surface to test it before driving.

2. The maximum amount of slow you should drive over should just reach the lower portion of the differential. If the surface consists mainly of fresh, unpacked snow, the maximum height may reach the lower portion of the bumper. Anything deeper will require you to remove part of the snow from the path and then continue.

3. The quality of the snow will change it’s reaction to a vehicle. Vehicles may become more easily stuck in wet, icy snow patches.

4. Some vehicles will be more stable when driving in trails left by other vehicles.

Starting the vehicle

Releasing the clutch pedal quickly will result in a loss of traction. To start the vehicle, release the clutch slowly and gently. Also, select a higher gear. For automatic transmissions, simply release the brake pedal to set the vehicle in motion.

Driving speed

On a snowy or icy surface, drive at no more than half the recommended speed limit.

Steering operation

1. Use specially designed tires for driving on snow*. Having excesscondence when driving a 4×4 over snow may result in the vehicle getting stuck or having an accident. Once the vehicle loses traction there is no dierence between a 4×4 and a 4×2 vehicle.

*Snow tires: These are tires specically designed for driving in snowy or icy conditions. The main benet of this tire is the ability for it to remain elastic under cold conditions, which improves its traction. The tire’s tread is specically designed for smooth, comfortable driving over snowy and/or icy roads.

2. Making tight turns is dangerous. If the vehicle begins to skid, the vehicle will travel to either the lowest portion of the road or towards the tire which began slipping. Slowly press the accelerator (do not release it) and steer in the opposite direction to regain control.

3. When the vehicle begins to loose control while turning, drivers tend to over-compensate. Drivers must be aware of this trend, since the vehicle may suddenly regain traction and then begin to severely skid out of control.

Brake

1. Test the brakes to see if a wheel lockup is possible, but in a secure, open area. Knowing this limit allows the driver to make delicate maneuvers under high-pressure situations.

2. Vehicles equipped with snow tires or chains have less horizontal grip than conventional tires. Therefore, driving speed must be reduced before making a turn.

3. The roads immediately before an intersection or corner tend to be slippier than normal, since many vehicles have previously applied the brakes in these places before.

Uphill climbing

Begin your ascent observing the vehicles in front of you and try to not stop when climbing. If you are forced to stop and cannot restart, return to the base of the hill and start your climb from the beginning.

Downhill driving

Switching gears or a sudden deceleration when driving downhill should be avoided, otherwise the vehicle may lose traction. Select a low transmission gear and allow the engine to do the braking for you.

  • Tire Chains

1. There are metallic snow chains and non-metallic snow cables. Snow cables are lighter, and are easier to install and transport. On the other hand, metal snow chains are heavier and are more dicult to install, although they are more economical and are easier to repair should they become damaged.

2. Snow chains or cables should be installed as soon as snow begins to fall continuously. If other vehicles are driving with them, that is a good sign to install them. In the case of a 4×4, install the snow chains on the tires which are supporting the greatest amount of weight. For driving over deep snow or driving downhill, install the chains on the front tires. When driving uphill or over more compact snow, install them on the rear. If chains are installed on the front tires they may cause damage to the inner portion of the wheel, the axle or the brake lines. When installing chains on the rear tires, they may a ect steering performance, but allow for easier correction. If the vehicle becomes stuck, the chains may be removed and placed on the front tires to obtain more traction. Placing the chains on the front or rear wheels is a decision which should be made depending on the situation, but the rear tires are generally the norm.

  • Additional advice for cold weather driving

Snow accumulation on the vehicle

When driving, snow attached to the fenders may a ect steering, and visibility may be reduced by snow on the head lamps. Correct these possible issues by occasionally checking the vehicle.

Try to not bring snow into the vehicle

Be careful not to bring snow into the vehicle’s interior through your shoes and clothing, since it may make the pedals slippery or icy and may even freeze the pedals when the vehicle is parked.

Parking

1. Avoid parking in areas with strong winds snow, or where a large snowfall may occur if possible.

2. When parking for extended periods of time, take the time to clean all the snow o of the vehicle before driving again.

3. A way to assure the vehicle’s battery is maintained is by disconnecting it from the vehicle. When in extremely cold conditions, removing the battery altogether and storing it in a warmer location is also an eective measure. Changing the vehicle’s orientation when parked or putting cardboard or towels over the vehicle’s hood are not eective measures.

4. To avoid the vehicle’s brake pedal from freezing, park the vehicle without using the parking brake. Leave the vehicle in gear, either in rst gear or in reverse.

5. To avoid the windshield wipers from freezing to the glass, raise the wiper arms, avoiding the blades from touching the windshield.

6. To avoid the door locks from freezing, lubricate the lock with a non-corrosive grease or oil where you insert the key.

Door freezing

If you attempt to force the door open after it has frozen, you may damage the door and/or frame’s rubber seal. Apply heat with moderately warm water and wait for the door to unfreeze.

Fuel selection

Fuel will freeze below 10° Fahrenheit (-12° Celsius), blocking the fuel line. Leave some space in your fuel tank before arriving at your destination, which will allow you to rell the tank with anti/freezing fuel if it is available.

Battery fluid

When the battery does not have sucient uid, stored electricity will drain more rapidly and starting in cold weather becomes more dicult.

Amount of radiator fluid and antifreeze

Avoid freezing of the cooling system by using LLC Antifreeze liquid.

Windshield washer fluid

Driving in snowy conditions uses more windshield washing uid than usual. Make sure the reservoir is full.

Starting the vehicle

When a vehicle has been parked for an extended period of time, the radiator uid may freeze slightly, even when antifreeze is used. If the vehicle is started before the frozen liquid thaws, the little liquid remaining in the radiator may boil and rupture a hose. Allow the engine to heat up before moving the vehicle. Wait until warm air comes out of the air conditioning system or the temperature gauge begins to move.


Tips on How to Drive Over Difficult Terrain

Appropriate Seating Position

Make sure you are in a proper seating position, which is required for your driving safety, as well as allowing you to respond rapidly and correctly to any change in driving conditions. Make sure the vehicle is as stable as possible is one of the most important things to look for when driving over dicult terrain. As useful tip is to slide the seat forward and place the seat back in a more upright position than normally used once you enter a dicult terrain. This driving position will not only give you improved driving visibility, but also assure a three-point seating position with the left foot, knee and right hip, which allows you to maneuver the vehicle quickly and precisely.

Mirrors are your second set of eyes. Tips for proper adjustment

When additional attention is required on a path when driving over dicult terrain, the left and right side mirrors should be adjusted slightly downward in order to allow you to see the rear wheels and the drive line.

Close all windows

If the situation allows, all windows should be completely closed to avoid the entry of foreign objects and to serve as a precaution in the event of a rollover. It is extremely dangerous to take your head out of the window when driving in reverse. However, a small opening of two to three centimeters can be useful in allowing the driver to hear changes in engine conditions as well as slipping tires due to a loss of traction.

Correctly Handling the Steering Wheel

When driving o-road the use of the steering wheel is basically the same as when driving over paved roads. A lot of attention should be paid when driving over bumpy roads since potholes and bumps can make the vehicle tilt and/or kickback from the steering wheel. If the steering wheel is not held properly, the driver can suer broken fingers or sprained wrists.

Soft and precise braking control

Roughly operating the brake pedal can lead to steering lock and sliding of the vehicle when driving over wet, frozen surfaces, as well as sand and gravel, thanks to driving over low friction surfaces with a heavy vehicle. Special care should be taken when driving down steep slopes which are actually more slippery than expected. In this case, the pedal should be pressed softly. In principle, you should do most of your braking with engine compression and use the conventional foot brake as a secondary measure.

Always drive carefully!

In general terms, a 4WD vehicle is heavier than its 4×2 counterpart, due to additional drivetrain components. If you attempt to drive a 4×4 vehicle in the same way you would a 4×2 vehicle, you could end up with a longer braking distance or less responsive acceleration when starting o or overtaking another vehicle. In addition, the vehicle’s center of gravity is placed higher due to the additional necessary road clearance which is necessary for driving over dicult terrain. High G-Forces can aect the vehicle’s stability when turning
due to a larger side imprint. In order to properly maneuver with the unique 4×4 features mentioned above, you must always drive with caution and not be overly aggressive. Avoid any sudden operation such as quickly accelerating, sharp turns, stopping or shifting gears suddenly, since you may cause an accident or become stuck.


Basic information regarding a 4×4

How does a 4×4 work?

Different mechanisms and features of Four-Wheel Drive (4WD) systems

Most vehicles today are two-wheel drive vehicles, with traction either at the front (FWD) or at the rear (RWD). 4WD vehicles however have the ability to have traction on all four wheels, which allows for the vehicle to move even if one wheel has no grip. A vehicle with these features generally has more traction than a FWD or a RWD vehicle and provides greater stability in dicult terrain (such as in sand, mud or other slippery surfaces).

The use of 4WD vehicles


4WD Modes

In this guide, we’ll focus on the two most common Four Wheel Drive systems: Part-Time 4×4 and Full-Time 4×4.

Part-Time 4×4

In a Part-Time 4×4, a vehicle is generally moved through traction received at the rear axle (RWD) until the driver engages the Four Wheel Drive transfer (o -road gearbox). There are two types of transfer controls for a Part-Time 4×4.

1. Lever Type transfer : Move the transfer lever from “H4” to “L4”.

2. Electronic Switch Type transfer: By pressing a button or moving a switch.

Shifting into 4WD in older vehicles generally requires the vehicle to be at a complete standstill. However, most modern 4×4 vehicles allow you to engage 4×4 mode without having to stop the vehicle. This is known as shift on the fly. Because of this, confirm the appropriate procedure for your vehicle by reviewing the owner’s manual in order to avoid damaging the transfer case and a potential accident. When the vehicle shifts into Four Wheel Drive, an indicator light will usually light up on the instrument panel, which conrms that 4×4 mode is engaged. However this light burn out over time, which is why the best way to know if the vehicle has traction on all four wheels is by actually driving it.

Full-Time or Permanent 4×4

In a Full-Time 4×4, all four of the vehicle’s wheels are permanently connected to the engine. Here, the use of the transfer lever is not to engage or disengage the 4WD, but rather optimize the 4×4 system according to each drive surface.

Driving Fundamentals for Difficult Terrain

LSD & Center Locking Dierential

Some vehicles come equipped with an LSD or Limited Slip Dierential. In the case of a rear-wheel drive vehicle, if the rear wheel begins to spin due to loss of grip, the limited slip dierential automatically transfers a small amount of engine torque to the opposite wheel, thus avoiding getting stuck thanks to the single wheel with no grip. Some vehicles come equipped with front or rear Limited Slip Dierentials, depending on the type of traction available on the vehicle.

1. This type of dierential lock us useful when one or both wheels on the same side of the vehicle (left or right) are spinning due to lack of surface grip. Before using a diferential lock, the driver should first engage traction to both axles (H4 or L4 in Part Time vehicles, HL in Full-Time vehicles).

2. Front and rear differential locks should never be used in conditions others than those described previously, since this could make driving, and especially turning, very dicult. This is especially true if a center differential is locked and not only the rear, which will cause the vehicle to spin suddenly during acceleration or braking.

  • Engine braking: by removing your foot off of the accelerator, the engine canmaid in braking the vehicle. The resistance caused by the transfer case and transmission slows the engine speed, reduces the vehicle’s speed and effectively slows the vehicle. This is also known as “braking through engine compression”.

Braking when turning with a 4×4

When driving in 4WD mode, turning sharply will give the driver the impression that the vehicle’s differentials are locked. This is known as the tight turning phenomenon and is caused by the difference in speed between the front and rear axles. Although this doesn’t mean the vehicle is malfunctioning, if this is done on a road with good traction, it can cause premature tire wear and damage the drivetrain. This can be avoided by simply driving without the center differential locked (HL or LL).


Privacy Settings
We use cookies to enhance your experience while using our website. If you are using our Services via a browser you can restrict, block or remove cookies through your web browser settings. We also use content and scripts from third parties that may use tracking technologies. You can selectively provide your consent below to allow such third party embeds. For complete information about the cookies we use, data we collect and how we process them, please check our Privacy Policy
Youtube
Consent to display content from Youtube
Vimeo
Consent to display content from Vimeo
Google Maps
Consent to display content from Google